Not all of us are blessed to have mountains in our backyards. For many flat-landers, they need to go to the gym to master the stair-climber. However, going to a commercial gym is expensive, and the machines themselves are cost-prohibitive. For many, having a garage gym or an outdoor gym saves money in the long run. Do It Yourself projects are even cheaper than buying the equipment.
In this tutorial, we will be building a three-sided plyometric box measuring 20″×24″×30″ for $25-$50. This way the trainee benefits from various heights without sacrificing floor space for extraneous equipment.
 Tools
Tools
- Drill or screwdriver
- Circular saw
- Plywood blade (for the circular saw)
- L-square (optional)
- Jigsaw or router (optional)
- Clamps (optional)
- Pencil
Supplies
- 4’×8′ sheet of ¾” plywood
- 2×4 plank board, 4′ long (optional)
- Wood glue
- 1 5/8″ to 2″ deck-screw, wood-screws or dry-wall screws
First, draw out the plan to cut the plywood. To keep the waste to a minimum here is one already prepared.

Digitized based on the drawings of Scott and Derek Wales from “How to Build a(nother) Plyometric Box” by Jerred Moon.
 The reason why we are using ½” increments is simple math. The plywood is ¾” thick, and doubled up would be 1 ½”. So what is 28 ½” will become 30″ and 18 ½” will become 20″ in the final project. This will yield the desired 20″×24″×30″ box.
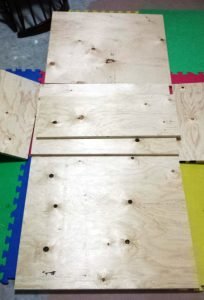
After the pieces are cut, we should have 8 pieces in total, which one will become scrap and the other seven will be used for the project. Technically, one would only need 5 pieces for the project and for that the measurements of the cuts would have to be adjusted for an open-ended box to give us the desired height. Also, the cross brace will give the box some weight-bearing strength. The other thing is that having all four sides will make the box stronger and heavier which would give us more of a workout while lifting and carrying the box.
To avoid making mistakes, make sure to label the edges with a pencil with the measurement. Also, it would be wise to label what each piece is for. In the project, we will have two end caps (20″×24″), two sides (28 ½”×24″) and two top/bottoms (18 ½”×28″) and one cross brace (11″×28 ½”).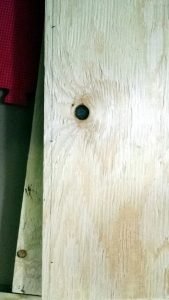
To prevent the wood from splitting, place the screws no less than 2 inches from the edge, and to maintain the structural integrity, place a screw every 4 inches. Some sections will require 3 inches away from the edge to prevent the wood from splitting, and these are when the ¾” meets the ½.” It is sufficient in some cases to only place one screw in the center.
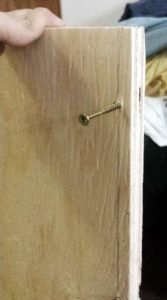 It might be helpful to trace where the center of the adjacent plywood is, and anchor the screw with a hammer before drilling them. This will assure the edges are straight and will hold in place while the glue sets.
Squirt some wood-glue on the edge of the plywood and keep a continuous pressure until reaching the end. Remember, once the two pieces are joined and the glue dried, it will be difficult to separate the two as they can handle up to 3 500 kg of downward pressure.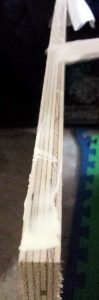
This is why placing the screws before joining the pieces is crucial as by drilling them in after joining the pieces with glue will ensure a 90° angle. Do not be afraid to use the L-square to double-check the corners are squared. It is important to keep the edges squared as the final product might rock a bit while jumping on and off if not done correctly.
Once the third piece is joined, then any further progress is self-correcting. One does not have to corner himself whether or not the corners will square to be a perfect 90°.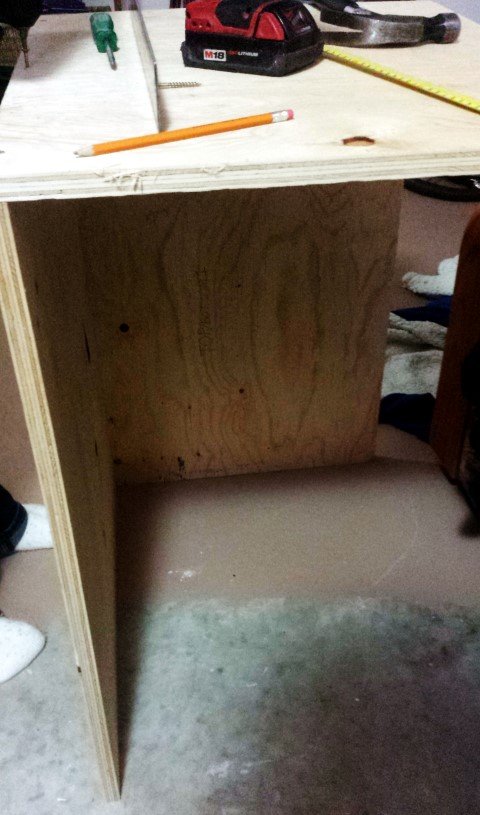
At this point, it is a matter of personal preference to finish the four sides or to add the center-brace with the addition of the third side. For a center-brace to be installed, the piece goes in length-wise as it is 11″ by 28 ½”.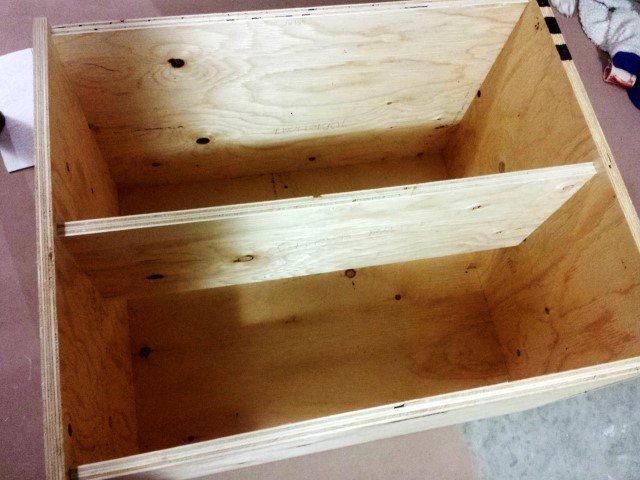
Remember to recess the cross-brace by ¾” inside the box as the plywood is of equal thickness. It would be wise to mark where the third-quarter inch is inside the box on both side to ensure the brace is level before closing the box up.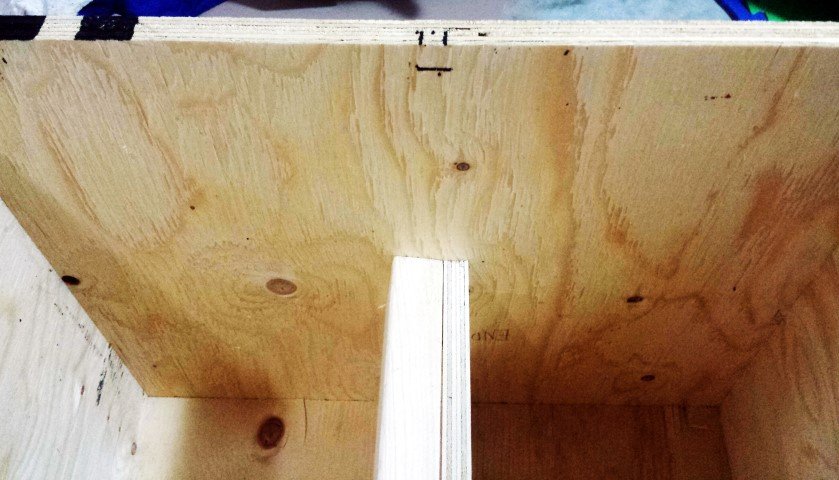
Don’t forget to mark where the brace is on the connecting pieces as one will have drill screws anchoring the top and sides to the brace. While marking the sides, draw a line down to about 11 ¾” down. It is far too easy to miss the brace if one goes too low.
Once the brace has been screwed in, finish the box with glue and more screws. Remember to make sure there is nothing inside the box before sealing it as it will rattle while being moved around. Once the glue dries, it is not worth one’s time to disassemble the whole project.
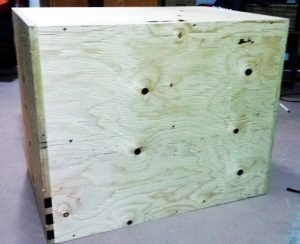
Now, we have a psychometric box which is 20″ by 24″ by 30″ which we can practice stepping up and improving our explosive jumps.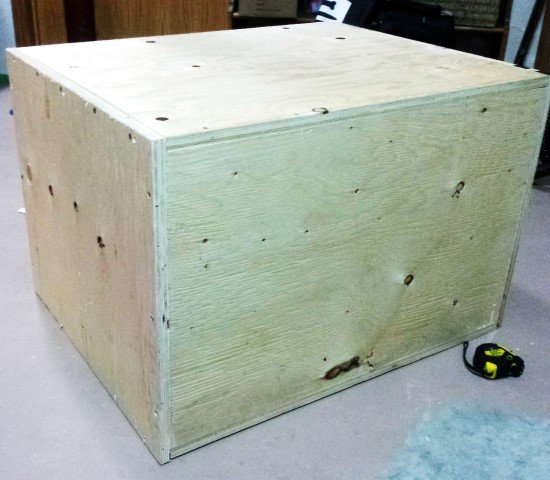

Since the box weighs about 23 to 27 kg, sometimes it is a bit awkward to pick up and carry. Some might find it beneficial to cut holes into the sides as handles. Handholds are best done before the project is in construction. For this project, the addition is a mere after-thought. For this, we need a jigsaw or a router. A router will result in a cleaner cut.
Since some plywood readily splinters more than others, some people will fill in the screws with putty or some filler and put on a coat of paint to halt the deterioration. Ask around the neighborhood if anyone has a pail of paint they need to dispose of. Paint and fillers are not in short supply, and many garages have them laying around. The decision adds some cosmetic is a personal choice.

CEO
Shahid Maqsood is an experienced writer and journalist with 10+ years in the industry. He is the CEO and founder of TheWisy, where he writes daily articles covering topics like books, business, news, sports, and more. Shahid holds an MBA from Virtual University of Pakistan and a Master's in Mass Communications. He is based in Faisalabad, Pakistan. His work spans multiple platforms like dosttrusty.com and newsbreak.com,Quellpress.com , airriflehunting, and bruitly.com showcasing his versatility and depth. Shahid's insightful articles reflect his expertise, authoritativeness, and trustworthiness, making him a respected and reliable voice in digital content creation. His contributions engage and inform readers, embodying professionalism and passion in every piece.